

At Verificaremails we have developed a widget to validate forms that allows you to verify in real time the data you capture through Web forms. Using our wizard you can implement verification services on any web form to verify emails, validate phone numbers, postal addresses, names and surnames.
Where should I create the Widget to validate forms?
In order to implement the widget in any form, you must log in to our portal and select in the left side menu the “WidgetJS” section.
A view will be displayed where you will see the active widgets and you can create new ones using the top button “+Create new widget”.
In order to use the widget you need to have an API of the service you want to use. Remember that you can simultaneously use several verification services to validate together: names, emails, phone numbers…
Form Verification Widget Configuration
Before you start, we recommend that you watch the video on how the service works. Implementing the Widget is not complex, but requires a minimum of technical knowledge. Using a widget for verification allows to reduce the implementation of the verification service in a form from days/hours to minutes.
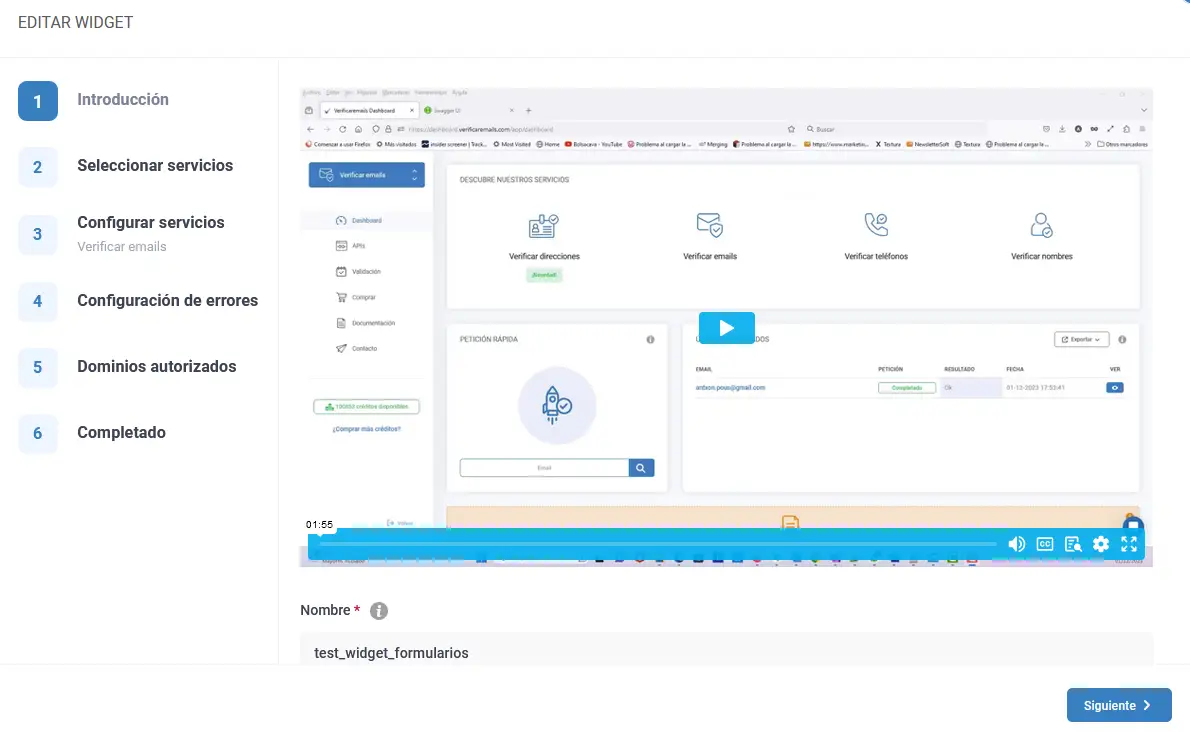
Step 1 – Introduction
First, you must enter a name to identify the Widget. Use a name that allows you to identify to which forms you apply the field verification. Remember that you can check more than one field in the same form.
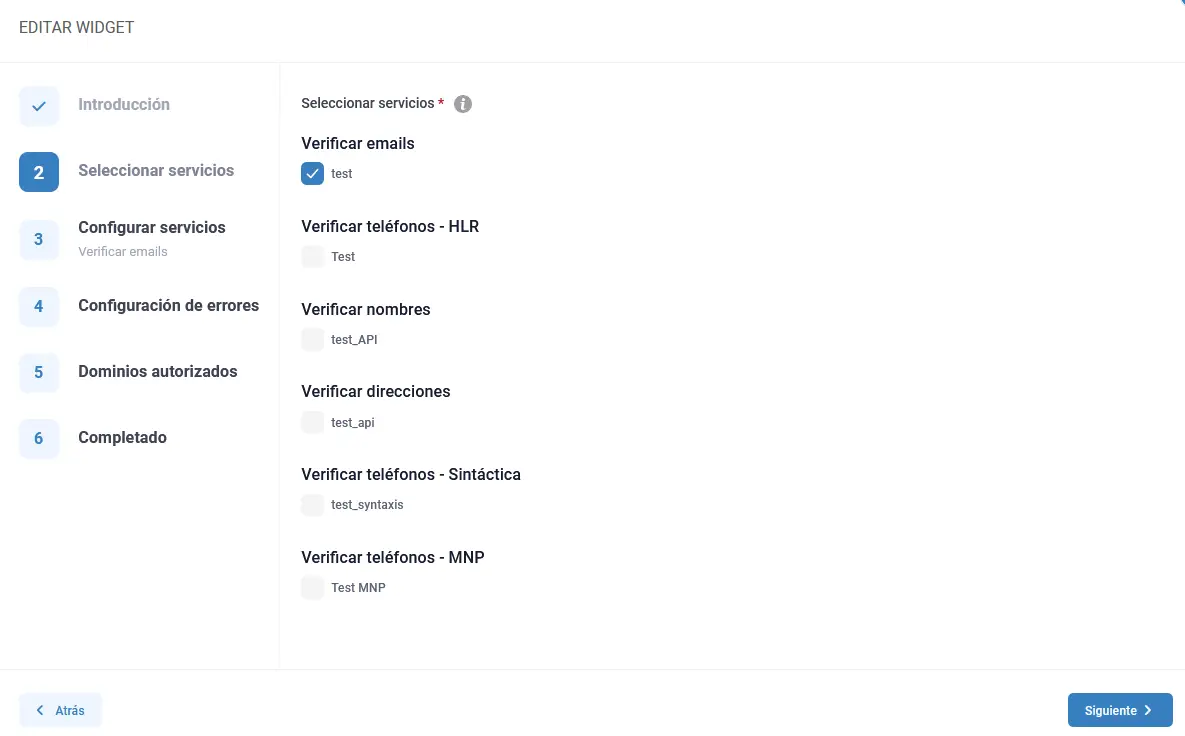
Step 2 – Select services
If you have previously created the APIs for the fields you want to verify, they will be listed under each service. If you have not created them yet, you must go to the APIs section with the navigation menu on the left.
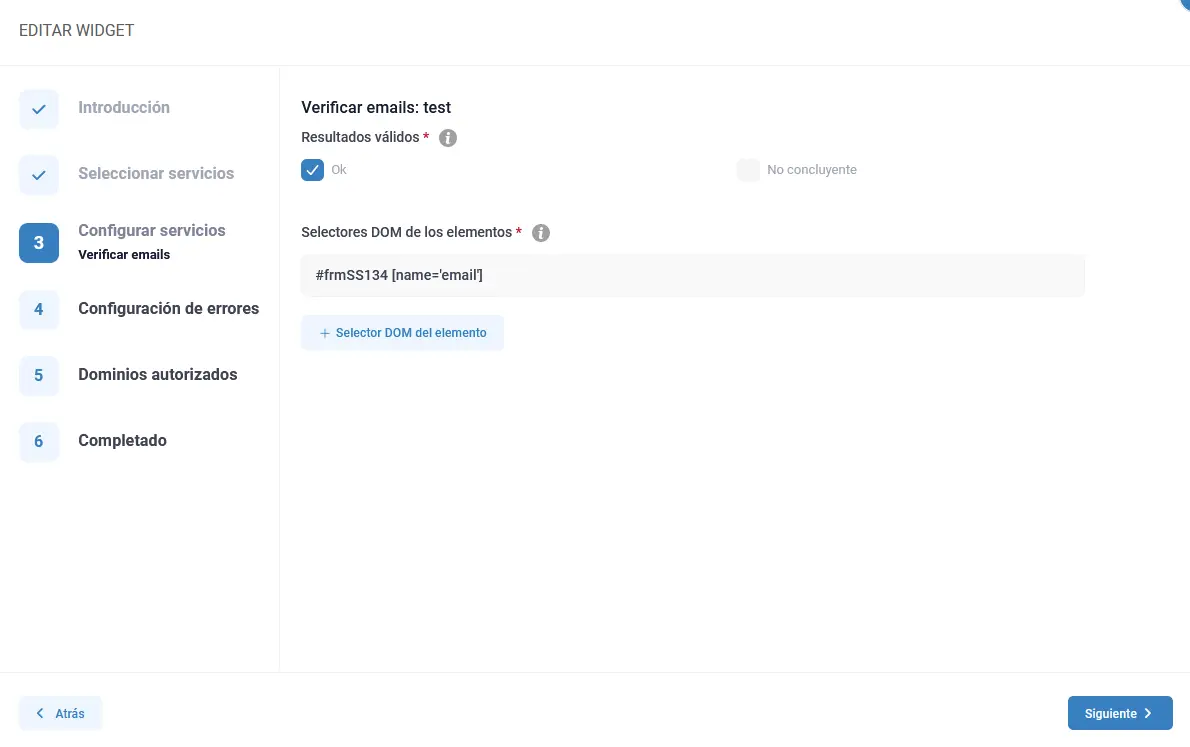
Step 3 – Configure services
For each of the services you will have to select if you only validate the fields with validation result “OK” or if you also accept the doubtful ones. For example, in the case of e-mail address verification. You may have emails that pass validation. In this case it will be marked as “OK” but we can also have dubious mails such as those that return “ok_for_all” or “accept_all”. We have grouped this type of mail under the category “Inconclusive”.
You must decide if you are going to let the user register this type of mails. This does not mean that the email address is invalid. We simply cannot reliably verify it. The same applies to the other fields: telephone numbers, postal addresses, names…
In the section “DOM selectors of the elements” we identify the DOM element that contains the field to validate, in our case the mail. There are several ways to define this field.
For our example if we have a form, where the form has an id=”frmSS134″ and the value that contains the email field is called name=”email”.
Ex:
<form method=”post” action=”https://www.marketingdeexperiencias.com/iris/form.php?form=134″ id=”frmSS134″ onsubmit=”return CheckForm134(this);”>
<table border=”0″ cellpadding=”2″>
<tr>
<td><span>*</span>
Your email address:</td>
<td><input type=”text” name=”email” value=”” /></td>
In the field “DOM selectors of the elements” we should enter
# frmSS134 [name=’email’]

If you do not know how to identify it, the easiest way is to put in “id” to the HTML field that contains the field to validate. You must indicate this field as #field_name.
For example, if we have an “email” field defined as:
<input type=”text” id=field_name name=”email” value=”” />
In this case, we must enter in the “DOM selectors of the elements” field
# field_name (the name must start with a letter)

Instead of “ID”, we can also use classes to identify the fields:
.my_form .my_field
Another combination is to use the form identifier with the name of the field, leaving:
#mi_formulario . [name=’nombre_del_campo’]
If all this is too complicated, pass this information to your developer and he will integrate it without any problems. For someone who is used to working with CSS it should not be complicated.
Using the Widget instead of having to do custom development allows you to implement form verification functionality in minutes rather than having to spend hours of work implementing your own verification service.
Step 4 – Error configuration
In this section we are going to configure how to display error messages. We can change the styles on how to display fields that have errors through the “Error type” field. Here we have to decide if we are going to use “Styles” or “Classes” to indicate that there is an error in the form.
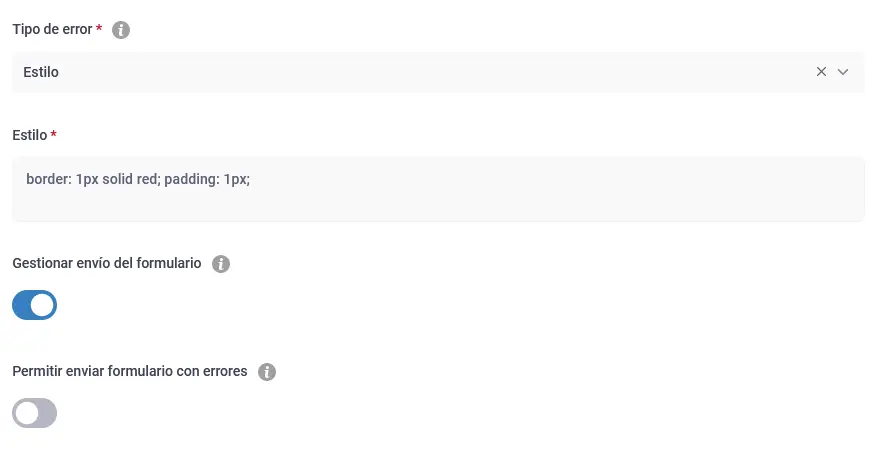
In our case we have selected “Styles”. This allows us to directly indicate the styles in the wizard. To prevent the validation process from affecting the form’s registration ratio, we have made the field check triggered in the “change focus” event.
In our case what we will do is that the form will show a red line in the field that fails at the moment that the user changes the focus from the “email” field to another element.
In this same section we have two additional options. The “Manage form submission” which allows you to block the submission of data until they are invalid. Remember that we can define what is valid data for each service in the “Configure services” option. If we disable the “Manage form submission” option the developer can use the “await widgetJS.isFormValid(#myform)” functions to capture and manage the verification states.
An additional field is “Allow to submit form with errors”. Here we can define how many times the user can send invalid data before saving it. We will use this option if we are interested in saving the data, even if they are partially erroneous.
Step 5 – Authorized domains.
In this option we will indicate in which domains the option to verify data can be used when verifying forms. This adds an extra level of security, preventing them from using the verification credentials for purposes other than verification on our website.

We recommend that you limit the number of API requests, per minute and total requests as an additional level of security.
Step 6 – Completed.
At this point we must copy and paste the code generated by the wizard in the page where we have our form. We recommend publishing it after the onesie.

For those of you who have a non-standard system, we have created a “maximum compatibility” version. This allows to make the verification widget even more compatible. You must place a part of the script inside the header of the page where the form is placed. If you can restrict this script in the page where you have the form much better, although the script is very fast it will always require a few milliseconds of processing.
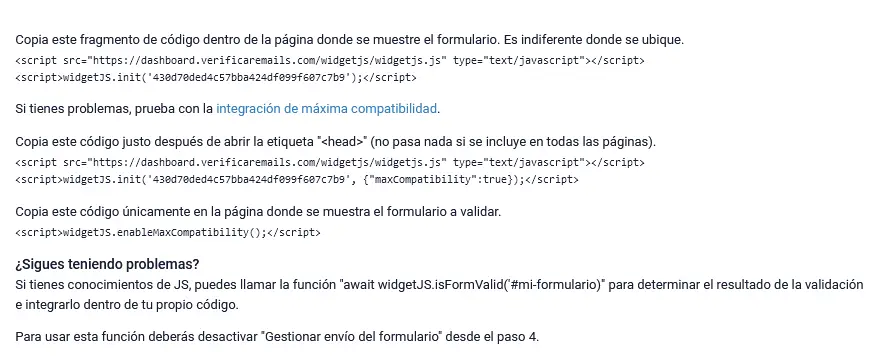
To launch the verification script you must also add the maximum compatibility script. This ensures that the verification functionalities are launched exclusively on the indicated page. Do not make them appear on every page of your website. This unnecessarily slows down the loading speed of the Web in sections where it is not used and our firewall can block the checks if the number of requests is too high by interpreting it as an attack.
<script>widgetJS.enableMaxCompatibility();</script>
Safety considerations
Remember when using a Widget you are exposing the API token. It is good that you only enable the domains where you want to display the form (defined in the “Authorized domains” section of the Widget configuration and that you also limit the total requests and requests per minute that the Widget can process. Set it to a number that makes sense for your usage pattern.

If you need help with the implementation of the Widget to validate forms, you can contact us through the chat assistant that you will find at the bottom right of the Web.
Remember that you can evaluate for free the service to validate emails by registering in our portal.


