


In this article, you’ll learn how to properly set up SPF, DKIM, and DMARC authentication protocols so that your emails arrive directly in your contacts’ inbox. We will show you step by step how to implement these verification systems that will protect your domain against identity theft and significantly improve the effectiveness of your email marketing campaigns.
You’ll discover the tools needed to verify your settings, avoid the most common mistakes companies make when implementing these protocols, and learn how to interpret DMARC reports to continuously optimize the performance of your shipments.
Key Points of SPF, DKIM, and DMARC
Correctly implementing SPF, DKIM, and DMARC is critical to maximizing the effectiveness of your email marketing campaigns and protecting your digital reputation.
• SPF, DKIM, and DMARC work together: These three protocols complement each other to create a complete authentication system that validates both the sending server and the integrity of the content.
• Direct improvement in deliverability: The right configuration can generate up to a 10% improvement in deliverability, significantly reducing emails marked as spam.
• Gradual implementation is key: Start with a “none” policy to monitor, work your way up to “quarantine” with incremental percentages, and finally apply “reject” for maximum protection.
• Spoofing Protection: DMARC effectively blocks spoofing attempts that could damage your brand and your customers’ trust.
• Continuous monitoring needed: DMARC reports provide valuable data to optimize configurations and identify authentication issues in real-time.
Properly implementing these protocols not only protects your domain against malicious attacks, but also optimizes the performance of your campaigns by ensuring that your messages reach your recipients’ primary inbox directly.
Remember that before sending any email marketing campaign it is highly recommended to use a service to validate emails to detect invalid addresses and avoid deliverability problems.
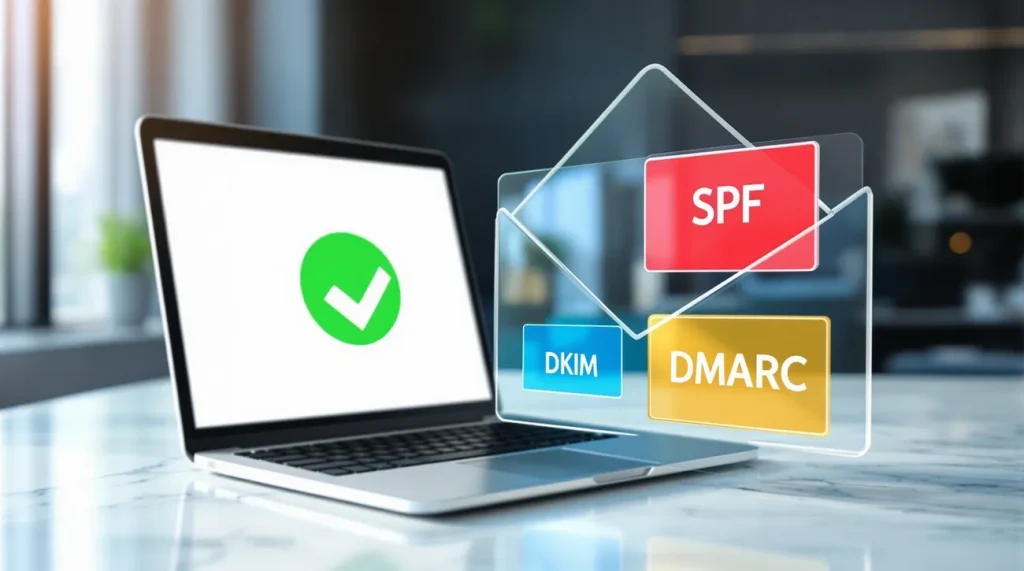
What are SPF, DKIM, and DMARC and why do you need to implement them?
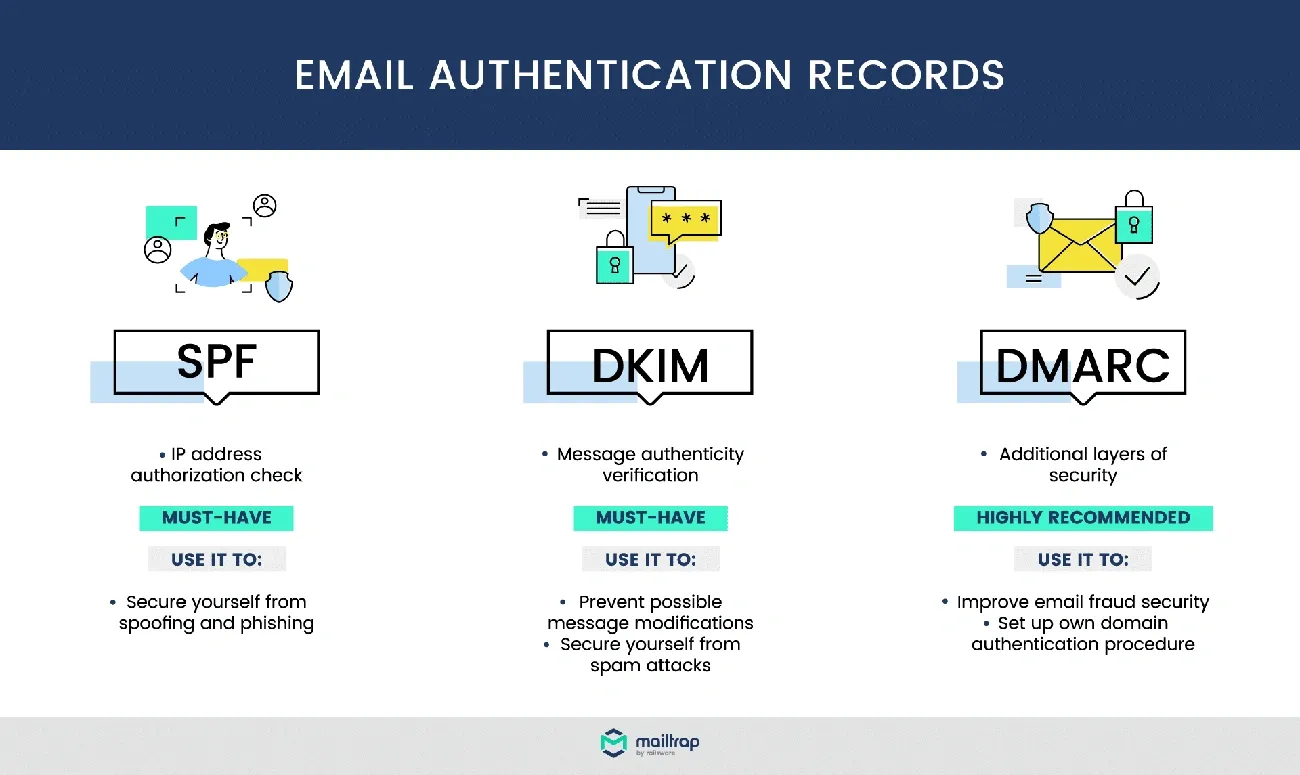
Image Source: Mailtrap
The SPF, DKIM, and DMARC protocols work as a triple-verification system that authenticates your emails and protects your domain against spoofing. Remember that these three standards complement each other: while SPF verifies the sending server, DKIM protects the message content, and DMARC sets the authentication policies.
SPF: How to verify that the server is authorized to send your emails
The Sender Policy Framework (SPF) works by using TXT records in your DNS that specify which servers can send emails from your domain. When a server receives a message from you, it automatically checks to see if the sender’s IP address matches the authorized servers in your SPF record.
The SPF verification system can return these results:
- Pass: The server is authorized to send emails from your domain
- Fail: The server is not authorized (hard rejected)
- None: No SPF record for your domain
- Neutral: SPF record exists but does not specify authorized IP addresses
- Soft fail: The server is probably not authorized
- Temporary error
- Permanent error: The SPF record contains syntax errors
We recommend you keep in mind that SPF has an important limitation: it only validates the MAIL FROM address (invisible to users) and fails when messages are forwarded by other systems.
DKIM: The digital signature that guarantees the integrity of your messages
DKIM (DomainKeys Identified Mail) uses public-key cryptography to digitally sign specific parts of your message, ensuring that it hasn’t been modified during sending. Unlike SPF, DKIM signatures remain valid even when the mail is forwarded.
How does the DKIM verification process work?
Step 1: Your mail server signs the message with a secret
private key Step 2: The DKIM signature is included in the message
header Step 3: The receiving server gets your public key from the DNS
records Step 4: Verify the signature to confirm the authenticity of the message
DKIM complements SPF perfectly because it can validate emails that could fail SPF verification, especially messages forwarded or sent through shared hosting services.
DMARC: Your security policy for unauthenticated emails
DMARC (Domain-based Message Authentication, Reporting and Conformance) builds on top of SPF and DKIM to create a comprehensive authentication policy. In addition to checking alignment between domains, DMARC tells you exactly what happens to emails that use your domain.
The three available DMARC policies are:
- None (p=none): Only monitors without taking action on suspicious messages
- Quarantine (p=quarantine): Sends suspicious messages to the spam folder
- Reject (p=reject): Completely rejects messages that fail authentication
DMARC also generates aggregated and forensic reports that allow you to identify legitimate sources of mail, detect spoofing attempts, and adjust your settings to improve deliverability.
If you implement these three protocols correctly, you will get maximum protection against phishing and spoofing attacks, while significantly improving the delivery rates of your email marketing campaigns.
How to Properly Configure SPF, DKIM, and DMARC
We’ll show you step-by-step how to implement these authentication protocols in your domain. Although the process requires specific technical configurations, following our instructions will help you protect your domain effectively without the need for advanced knowledge.
Creating TXT Records in DNS
To set up these authentication protocols, you must add specific TXT records in your domain’s DNS settings. You can do this through the admin panel of your domain registrar or hosting service.
SPF Settings:
Go to your domain’s DNS admin panel and create a new TXT record. In the Host/Name field, enter “@” (which represents your primary domain). For the value of the record, use the format: v=spf1 a mx include:_spf.ejemplo.com -all
DKIM Settings:
First you need to generate the public and private keys. Many email providers such as Google Workspace or Microsoft 365 automatically generate these keys. Once you have the keys, create a TXT record where the Host/Name is “selector._domainkey” (where “selector” is your unique identifier) and the value is formatted: v=DKIM1; k=rsa; p=MIGfMA0... followed by your public key.
DMARC Settings:
For DMARC, create a TXT record with Host/Name “_dmarc” and as a value: v=DMARC1; p=none; rua=mailto:informes@tudominio.com
Key parameters: v=DMARC1, p=none/quarantine/reject
The parameter v=DMARC1 indicates the version of the protocol and is required in all DMARC records. However, the most important is p=, which defines which policy to apply to emails that fail authentication.
We recommend you always start with p=none because this setting only monitors without taking action on your emails. Once you’ve verified that everything is working properly, you can move on to p=quarantine sending suspicious messages to the spam folder, and finally to p=reject completely reject fraudulent emails.
Other important parameters you can configure include pct= applying the policy only to a specific percentage of messages, rua= to receive aggregate reports, ruf= for detailed forensic reports, and sp= to define specific policies for subdomains.
Remember that a gradual rollout is essential to avoid blocking legitimate emails. The process should be: p=none to monitor, then p=quarantine with incremental percentages, and finally p=reject when you have verified that there are no problems.
Tools to verify SPF, DKIM, and DMARC in real-time
Once your logs are set up, you need to verify that they are working correctly. For this, you can use several free tools:
MXToolbox offers you protocol-specific verifiers. Its tools analyze your DNS records and display detailed diagnostic information about potential configuration issues.
EasyDMARC provides a specialized DMARC record checker that checks the syntax of your configuration and explains each parameter clearly.
DMARCLY works differently: you email check@dmarcly.com and receive a full authentication report that includes SPF, DKIM, and DMARC status.
URIports validates multiple email security protocols simultaneously, including the three you need to configure.
These tools not only confirm the existence of your records, but also identify syntax errors and common issues such as exceeding the 10-DNS lookup limit on SPF records. If you have any questions during the setup process, our support team will be happy to help.
What improvements you’ll see in your campaigns after implementing SPF, DKIM, and DMARC
Once you properly set up these authentication protocols, you’ll experience significant changes in the performance of your email marketing sends. The results are measurable and directly reflected in the most important metrics of your campaigns.
Fewer emails in the spam folder
When you implement SPF, DKIM, and DMARC, mail servers immediately recognize that your messages are coming from a legitimate, verified source. This automatic validation makes your emails take precedence over unauthenticated ones.
Companies that have successfully implemented DMARC report up to a 10% improvement in the deliverability of their campaigns. This improvement is due to the fact that providers such as Gmail and Yahoo prioritize senders who use authentication in their algorithms.
Without these protocols, Microsoft Office 365 automatically sends unauthenticated emails to the spam folder. In addition, many vendors display visible warnings that alert users to potential security risks.
Increased engagement with your contacts
By ensuring that your emails reach the main inbox, you dramatically increase the chances that your contacts will interact with your content. Benefits include:
- Complete visibility of your messages for all recipients
- Remove red question marks that Gmail shows in unauthenticated emails
- Building a strong reputation as a trusted sender
The reports generated by DMARC provide you with accurate data on the performance of your shipments, allowing you to identify authentication issues and continuously optimize your results.
Complete fraud protection
Phishing poses a serious threat to your brand and the safety of your customers. DMARC acts as a protective shield through three key mechanisms:
- Alignment Verification: Confirms that the domains in the “From” field match those validated by SPF and DKIM
- Policy enforcement: Set specific actions (none/quarantine/reject) to deal with suspicious emails
- Reporting: Informs you about all attempts to impersonate your domain
This protection is crucial because cybercriminals often use legitimate domains to send fake invoices, impersonate company executives, or execute phishing attacks that can compromise your customers’ security and irreparably damage trust in your brand.
Common Mistakes When Implementing DMARC and How to Avoid Them
Despite the obvious benefits, many companies make critical mistakes that reduce the effectiveness of DMARC. Interest is growing exponentially, but less than 20% of domains have their DMARC policy properly configured to protect against spoofing.
Do you confuse Monitoring with Protection?
One of the most frequent mistakes is to believe that setting up p=none Protect your domain. Many companies maintain this setup for years, incorrectly thinking that they are protected. However, this policy only collects data without blocking fraudulent emails.
Another critical mistake is jumping straight to p=reject without pre-check. We recommend that you avoid this practice as it will likely result in loss of legitimate emails. To prevent these blockages:
- Always verify SPF and DKIM alignment before changing policies
- Avoid exceeding the limit of 10 DNS lookups on your SPF records
- Use DKIM signatures for all outgoing emails
- Don’t forget to set up registrations for subdomains and inactive domains
Progressive Implementation: The Key to Success
The path to successful implementation requires patience and a gradual approach. Instead of applying restrictive policies immediately, follow this sequence:
Step 1: Start with p=none for 4-6 weeks to monitor without impact
Step 2: Progress to p=quarantine incremental percentages (pct=5, 25, 50, 75, 100)
Step 3: Finally, implement p=reject following the same percentage progression
This strategy allows you to identify and fix problems progressively. Remember that you can use the tag pct= to apply policies only to a specific percentage of messages, minimizing risks during the transition.
Continuous Monitoring: A Process, Not an Event
Implementing DMARC doesn’t end with the initial setup. DMARC reports provide you with valuable insights into:
- Which servers send mail from your domain
- What percentage of messages pass authentication
- Which servers send DMARC failing messages
- What actions do receiving servers take?
We recommend creating a dedicated mailbox for these reports, as their volume can be considerable. For large organizations, consider third-party services that analyze these complex XML reports and turn them into actionable insights.
Regular monitoring allows you to identify legitimate email sources that might be failing authentication and adjust settings to improve deliverability.
Why It’s Worth Implementing These Authentication Protocols
The right SPF, DKIM, and DMARC settings directly improve the performance of your email marketing campaigns. These protocols work as an integrated system that authenticates your emails and protects your domain against spoofing attempts.
The improvement in deliverability translates into concrete results: more emails reach the main inbox, open rates increase and the number of messages marked as spam is significantly reduced. Your sender reputation progressively improves, creating a positive cycle that benefits all your future communications.
We recommend following the gradual approach we’ve explained: start with the “none” policy to monitor for a few weeks, work your way up to “quarantine” with incremental percentages, and finally implement “reject” when you’re sure everything is working correctly. This process will allow you to identify and fix issues before applying more restrictive policies.
Remember that implementing these protocols is not a one-time event. Continuous monitoring using DMARC reports will provide you with valuable insights to optimize your setup and maintain maximum effectiveness in the long run.
The time investment in correctly configuring SPF, DKIM, and DMARC is quickly recouped through the improved performance of your campaigns. If you have any questions during the implementation process, our support team will be happy to help you optimize your email deliverability.
I told you that it is just as important to have emails that correctly implement SPF, DKIM and DMARC as it is to authenticate the validity of email addresses to ensure the deliverability of your messages. You can automate the entire procedure by using the API to validate email addresses ensuring the quality of your messages.
FAQs
Q1. What is the main function of SPF, DKIM, and DMARC in email marketing?
SPF, DKIM, and DMARC are authentication protocols that work together to verify the legitimacy of emails, improve deliverability, and protect against spoofing. SPF verifies the sending server, DKIM ensures content integrity, and DMARC sets domain-based authentication policies.
Q2. How can I successfully implement DMARC in my domain?
Implement DMARC gradually. It starts with a “none” policy for monitoring, then progresses to “quarantine” with incremental percentages, and finally to “reject.” Create a TXT record in your DNS with the name “_dmarc” and a value that includes the version, policy, and reporting address. Monitor DMARC reports regularly to adjust settings.
Q3. What benefits does the implementation of these protocols offer for my email campaigns?
The correct implementation of SPF, DKIM, and DMARC can significantly improve the deliverability of your emails, reducing those marked as spam by up to 10%. This results in higher open and click-through rates, better sender reputation, and protection against phishing, which increases the trust of your recipients.
Q4. How can I check if my SPF, DKIM, and DMARC settings are correct?
There are several free online tools to check your settings. Some popular options include MXToolbox, EasyDMARC, DMARCLY, and URIports. These tools analyze your DNS records and provide detailed information about SPF, DKIM, and DMARC settings, helping you identify and fix potential issues.
Q5. What mistakes should I avoid when setting up DMARC?
Avoid leaving the DMARC policy at “none” indefinitely, as this doesn’t really protect your domain. Don’t implement a “reject” policy without first monitoring and phasing it down. Make sure you don’t exceed the limit of 10 DNS lookups on your SPF records. Set up registrations for inactive domains and subdomains. Maintain continuous monitoring of DMARC reports to identify and resolve authentication issues.


